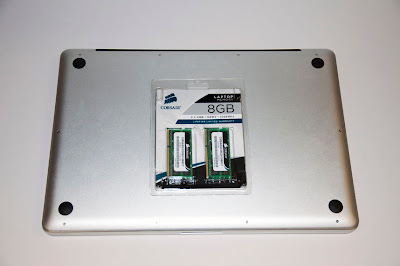
How to upgrade Macbook Pro RAM memory
How to upgrade Macbook Pro RAM memory
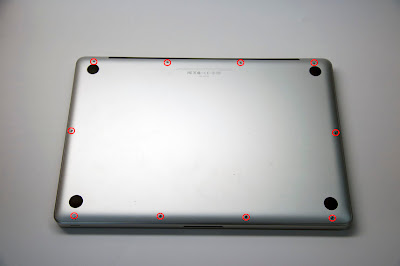
Start off by unplugging your MacBook Pro from the power source and anything else it may be connected to. Then place it upside down on a surface that will not scratch the lid of the laptop. Now carefully remove the ten Phillips head screws circled in red.
It is important that you keep track of where each screw goes, as there are three different lengths of screws. Below you can see I laid out each screw according to the hole that it belongs in.
Once all the screws have been carefully removed you can now remove the bottom cover. The cover will come off fairly easily. You can use your finger nail to get under the cover and lift up in an even manner. You should not use a screw driver to pry the cover off as you will scratch or damage the laptop.
Now that the cover is off you can set it aside. Before touching any of the internals of the laptop you should touch the metal exterior of the laptop to ground yourself. The area circled in red would be a good area to ground yourself.
As you can see this MacBook has already been upgraded with a Corsair Force Series™ SSD however the memory has not been upgraded.
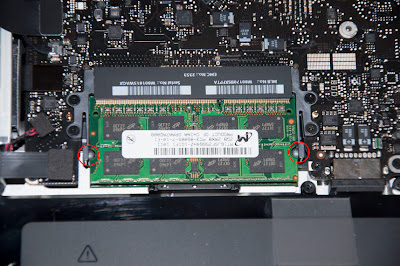
The memory modules are located near the center of the laptop. To remove the first module, gently push the levers circled in red outwards.
The memory module should then pop up at an angle. Gently grab the sides of the module (circled in red). You can now remove the module from the slot by pulling the module towards you. Do not try to lift the memory upwards as that may cause damage to the slot and the memory.
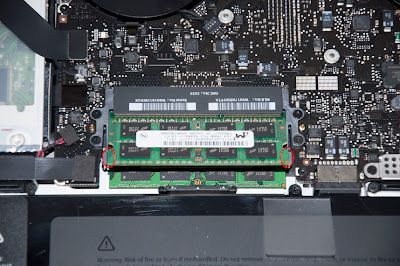
Now that the first module has been taken out you can remove the second module following the same procedure. Note that the levers for the second module may be hard to see, as the first set of levers are directly above them.
After both of the old modules are out of the machine, line the notch (circled in red below) in the new module up with the memory slot.
To insert the new module you will need to slightly angle the module similar to when you released the levers.
Once the module is inserted into the slot gently push down on the module to lock it in place.
Finally repeat the same process to put the second module in the top memory slot.
Now you can place the cover over the bottom of the MacBook and tighten all of the screws down.
Finally check that all of the memory is being seen by going to “About this Mac”. Congratulations! You have successfully upgraded your MacBook's memory.
This article was initially made by Jake Crimmins at the Corsair blog (http://goo.gl/PRn4b). All credits go to him. I hope that this tutorial helped you too. Share this post on How to upgrade Macbook Pro RAM memory


 Previous Entries


0 comments for How to upgrade Macbook Pro RAM memory
Leave a reply